The out of the box method of managing your Musiccast devices is through the officially support Yamaha Musiccast app for your smartphone or tablet. However, if you have paid for Musiccast functionality you may as well make the most of it by integrating management into home automation tools such as Alexa, Google Assistant and (our favourite) Home Assistant options.
To reduce any issues while using such tools with your Musiccast equipment, we recommend that you assign each of your devices a static IP before you begin automating.
Fortunately, its a fairly straight forward process.
Assigning Static IPs to Yamaha Musiccast Devices
Table of Contents
Identify a range of addresses
Before assigning address you need to identify which addresses you wish to use. All existing devices on your router will be assigned IP addresses already and you do not want to try to assign an address that may conflict with an existing device. What I do is pick a range that my router is unlikely to assign. Most home broadband routers will assign addresses within the ranges 192.168.0.1 – 192.168.0.255 or 192.168.1.1 – 192.168.1.255 and they will start at the lower end of the scale and assign upwards as more devices connect. So for this example Ill pick the range starting at 192.168.0.180 and work up 181, 182 and so on until I have added all my devices/speakers.
Your devices will already have addresses and technically speaking you do not need to change these. I just find it neater and good practice to assign a specific range that is unlikely to be used by anything else.
Get the existing Musiccast Address

Open your Musiccast app and click settings. Select a speaker/device and scroll down and press information. Here you will find (amongst other information) the current IP address (mine is already set at a high number for demo purposes).
Open a Web Browser and Connect to that IP to Access network settings

Click to expand network settings.
Turn off DHCP Client

Click to turn of DHCP (DHCP is the method in which addresses are assigned automatically).
Add new IP Address and Click OK

If you want to keep the IP the same that will work but is not recommended.
Enter your wireless password

Its a little annoying but you have to enter your routers wireless password here or it will not work.
Check all looks good and click OK
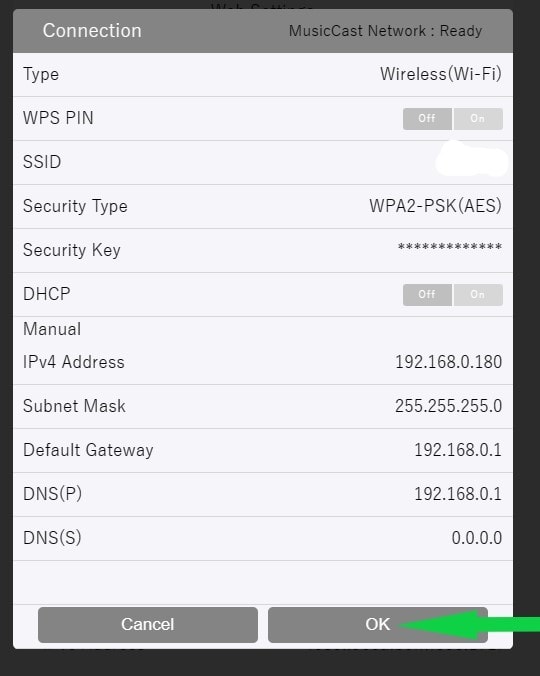
Click OK to restart
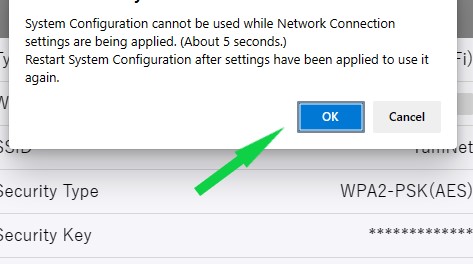
This will reboot the device and connect with the new IP (if you set a new one). To test it works open a new browser and enter the address.
Repeat for additional devices
Repeat the process for any other Musiccast devices you have.
Assign the static IP addresses in your router
A further step of good practice would be to go into your router and assign the static IPs to your router. The mac address of each device can be found in the same information screen of the app we used earlier to find the original IP addresses.
This will be less relevant if you chose to change the IP addresses to a higher range that will be unlikely to be assigned to other devices by your router.
For help assigning static IPs within your router please follow our guide on this link.
3 thoughts on “How to add Static IP addresses to Yamaha Musiccast Speakers, AV Receivers and Sound bars.”